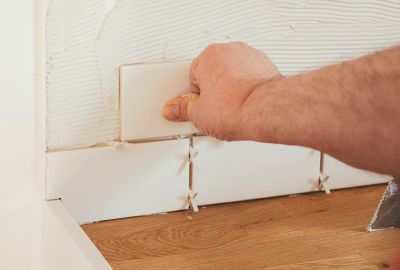
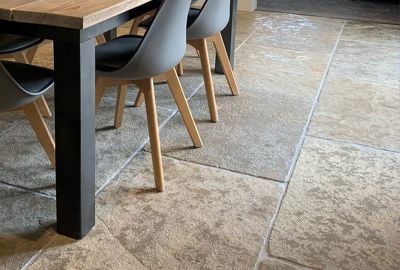
As advancements in high-definition printing and production technology continue to reshape the tile industry, the demand for seamless, contemporary tiled finishes with minimal grout lines has skyrocketed. That's where large format tiles come into play. In this guide, we’ll walk you through the ways to identify large flooring tiles, and the correct processes for laying large tiles and porcelain paving slabs on different surfaces.
What is the definition of a large flooring tile?
Generally speaking, a large tile is a tile which has an edge that exceeds 60cm’. One example of such a large format tile is our Timeless White Carrera Polished Porcelain Tiles. Large-format tiles are a fantastic design feature; however, they can bring with them a number of installation considerations that need addressing.
Our guide on the British Standards associated with tiling has plenty of information, but here’s what you need to know about what they say about large flooring tiles.
FAQs: How to lay large floor tiles
We’ve answered all the most common questions asked by customers hoping to lay large tiles or paving slabs, from tile installation advice to top tips and tricks.
How long should a new concrete floor be allowed to dry before laying large tiles onto it?
The British Standards mentions waiting at least six weeks under good drying conditions for the structural floor to undergo initial drying shrinkage, before laying large tiles on concrete. If the concrete substrate isn’t dry before tiles are fixed, then there’s a good chance that the tiles will crack or become loose.
Our guide on how to tile on concrete has plenty of guidance around how to work with this substrate before and during tiling.
Does laitance matter when laying large tiles on concrete floors?
Laitance is the name given to the impurity that forms on the surface of newly laid concrete, and should be removed by mechanical means to ensure adhesive or levelling screed bonds with the concrete.
Can I lay large tiles on a timber base?
According to the British Standards, new timber bases should be constructed with noggings between the joists. The overlay should also be ‘exterior grade plywood of 15mm minimum thickness’ and ‘should be screwed to both joists and noggings at 300mm maximum intervals’. Furthermore, the plywood sheets should be laid broken-bonded with the long edges running at right angles to the joints between the existing boards.
Check out our guide on how to tile onto wooden floors for more advice about working with wooden flooring.
What is the recommended width of joints when laying large format tiles?
For porcelain floor tiles or paving, the gap between tiles - known as the ‘grout line’ - should not be less than 3 mm. Wider joints (for example, 10mm wide) might be required to accommodate expected irregularities in the tiles, however, so get in touch with our experts if you’re ever unsure.
Is it a good idea to align floor and wall joints when installing large tiles?
It’s important to acknowledge that it’s practically impossible to align wall and floor tiles purchased from two different ranges or factories, as the finished sizes will invariably be different.
The British Standards states that ‘the practical difficulties involved in achieving alignment should not be underestimated’, and due to the extra time and materials it takes, ’allowances should be made for the greater costs which are likely to be incurred’.
Can I lay large tiles over two different substrates?
If you’re laying large format tiles across two different substrates, say you have an existing wooden floor and are building a new extension with a concrete floor, you should take appropriate action to make sure the substrates are sound and level. The best practice is to lay an anti-fracture matt across the entire floor surface to help prevent differential shrinkage and movement in the substrates.
How to prevent large porcelain floor tiles from cracking or coming loose?
To prevent large format tiles from coming loose or cracking, it’s advised that you isolate the tile bed from the base by a separating layer. This stops the two elements from adhering to each other and allows each to move independently. We recommend Kerakoll Idrobuild Anti-fracture Tex Mat as a solution. The matting forms a layer between the substrate and the tile, with the aim of minimising any movement between the two.
Of course, while you can implement the necessary preventative measures, tile breakage is sometimes unavoidable. If this is something you’re concerned about, read our guide highlighting simple DIY repairs to stone tiles.
Can I fit large tiles on an uneven floor?
Laying tiles on an uneven floor is problematical and will result in ‘lippage’. Floor surfaces are rightly expected to be flat, and it’s the responsibility of the tiler to check. The British Standards suggests that across any 2m length of floor, the acceptable tolerance in flatness is 3mm.
The standard also acknowledges that large floor areas may be a little higher in central areas than the edges and deems a level of flatness across any two points should be no more than 15mm. Should the substrate be out of tolerance then a levelling compound should be used to rectify the situation.
Laying large porcelain floor tiles with a cementitious adhesive
The British Standards suggests when floor tiles and outdoor tiles are fixed using normal cementitious adhesives, the adhesive should be applied to the sub-floor as well as to the back of the tile to ensure solid bed fixing.
This is particularly relevant to tiles that have a ribbed back, to achieve the recommended 100% coverage of adhesive. The adhesive should be applied to the substrate with a notched trowel, which will give a total bed thickness of 3mm - 4mm once the tile is secured into place.
Hopefully you now feel a little more confident approaching your next tiling project, but it’s completely normal to still feel a little nervous. Fortunately, if you’re at all unhappy with the quality of your tiler’s workmanship, the recognised UK industry trade body The Tile Association offer an inspection service that will give you a full technical appraisal of your installation, and advise whether the appropriate best working practices have been adopted and relevant British Standard have been adhered to.
Alternatively, for even more insight from our team of experts, check out our tile installation advice guides, including how to prepare your floor for tiling.


