
When deciding on a new flooring style or wall tile options for your home, you’ll have likely come across herringbone tiling. Usable with a number of different tile materials, styles and sizes, Herringbone is a distinctive tile laying pattern that’s been around for over 2,000 years.
In this article, we’ll explain what a herringbone pattern is, as well as how to lay herringbone tiling in any room.
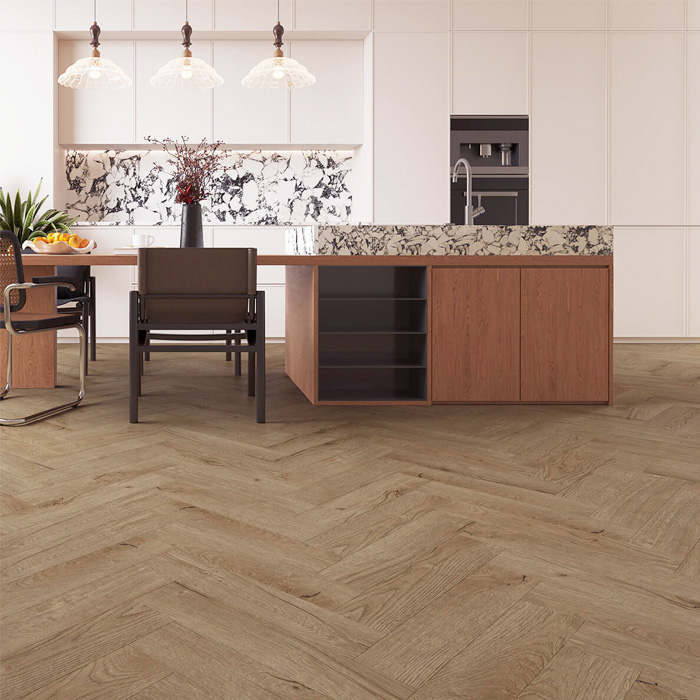
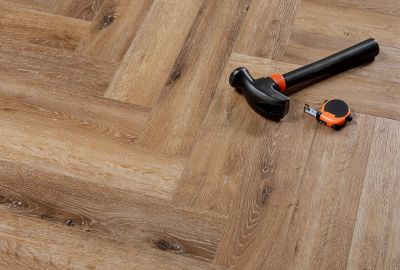
Aspen Oak Click Luxury Vinyl Tiles
What is a herringbone pattern?
The creation of a herringbone pattern involves laying rectangular tiles in a zigzag pattern, traditionally resembling the skeleton of a herring fish (which is where it gets its name). The pattern is characterised by a series of lines that meet at a 45-degree angle to form a V shape. Known for its pleasingly geometric appearance, the herringbone pattern is chosen by many homeowners when laying new floors and looks great in both modern and traditional spaces.
What kind of tiles do I need for a herringbone pattern?
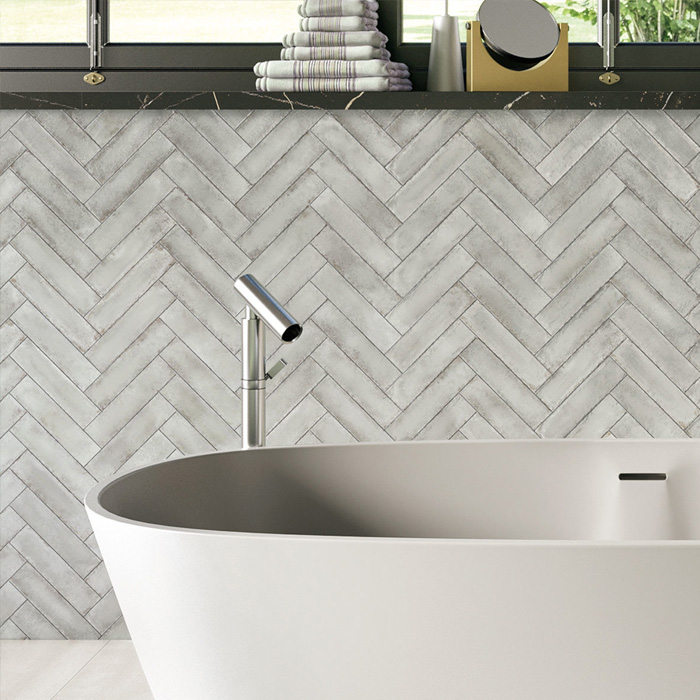
A herringbone pattern can be created using various materials such as ceramic or porcelain tiles or even LVT planks. The only requirement is that the tiles are rectangular, as that way they can be arranged in a herringbone shape. As such, metro tiles or our wood-effect porcelain tile planks are the ideal pick!

Discover our full metro tile range and order a free full-size sample!
The pros and cons of herringbone flooring
Now you know what herringbone is and the types of tiles you can use, there are a few factors to consider before knowing if it’s the right fit for your project.
The benefits of herringbone flooring
Herringbone flooring has several advantages that contribute to its popularity, with some of the benefits including:
- Visual appeal: Herringbone patterns are truly striking, adding a touch of sophistication and elegance to any space. The pattern can enhance the overall aesthetic of a room and create a timeless look. In addition, herringbone tiling can help to elongate a space, through its diagonal lines that draw the eye along.
- Style versatility: Herringbone patterns can work well pretty much anywhere and beautifully complement various interior design styles, from traditional to modern and minimalist to quirky.
- Easy to clean: As with other any tiled area, herringbone flooring is generally easy to clean and maintain. Regular sweeping and mopping can keep the floor looking fresh, while herringbone wall tiles can be cleaned using everyday household products.
The drawbacks of herringbone flooring
While herringbone flooring has many benefits, it's essential to consider potential challenges associated with this pattern.
- Installation complexity: Fitting herringbone patterns can be fiddly and slightly more time-consuming than using simple larger format tiles. Achieving the perfect alignment, especially at corners and edges, requires precision and attention to detail. As a result, misalignment can be more noticeable in a herringbone pattern compared to more basic layouts.
- Increased waste: The shapes required to create the borders of the herringbone pattern may result in more tile waste during the cutting process compared to a straight layout. This can also slightly increase the overall cost of the materials. If you’re wondering how to measure for a herringbone pattern, read our guide to choosing the right number of tiles.
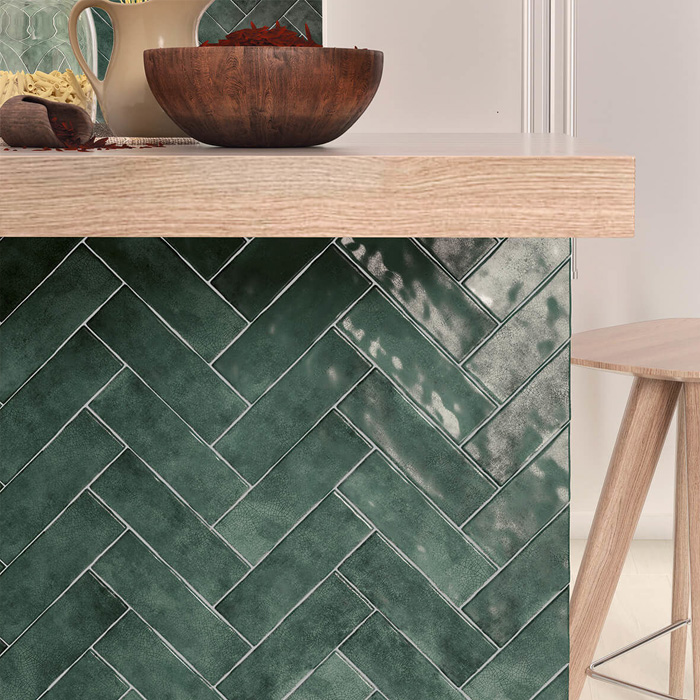
Salcombe Emerald Crackle Metro Tiles
What tools and equipment will I need to lay a herringbone floor?
When laying herringbone tiling, you'll need a variety of tools and materials to ensure a successful installation.
- Tile saw: Necessary for cutting tiles to fit the edges and corners of the room.
- Tile cutter (optional): An alternative to a tile saw, which is especially useful for smaller and simpler cuts.
- Gauging trowel and notched trowel: Used to apply and spread adhesive on the floor before laying the tiles.
- Rubber mallet: Helps to gently tap tiles into place and ensure they are level.
- Carpenter's square: Useful for ensuring that tiles are laid at a 45-degree angle to create the herringbone pattern.
- Spirit level: For checking the level of the tiles during the installation process.
- Tile spacers: A little X-shape of plastic used to maintain consistent gaps between tiles for grout lines.
- Grout float: Used to apply grout into the joints between tiles.
- Sponge and bucket: For cleaning excess grout from the tiles during the grouting process.
- Safety gear: Wear safety glasses, gloves, and kneepads to protect yourself during cutting and installation.
- Tiles: Choose the type, size and colour of tiles that fit your design preferences and the requirements of the space.
- Tile adhesive: Select an adhesive that’s appropriate for the type of tiles and surface.
- Caulk: Use caulk to fill gaps at the edges and corners where the tiles meet walls or other surfaces.
- Grout: Choose a grout colour that complements your tiles and enhances the overall appearance of the herringbone pattern.
- Bucket of water: For cleaning tools and managing the consistency of the grout.
How to tile in a herringbone pattern
Here’s a step-by-step guide on how to lay a herringbone floor.
- Step 1: Ensure that the surface is level, in good condition, damp-free, clean, and dry.
- Step 2: When installing tiles, you should begin at a central point and work your way outwards to each corner, rather than starting in a corner or along the edge of a wall. So, begin by finding the central point of the room.
- Step 3: Lay out a few tiles in the herringbone pattern without adhesive so that you can visualise how the pattern will look and make any necessary adjustments.
- Step 4: Apply adhesive to a small section of the floor (one square metre or less), starting from the central point. Use the gauging trowel to apply the adhesive, then the smooth edge of the notched trowel to spread it, followed by the notched side to create even grooves.
- Step 5: Begin placing the tiles along the centreline, working outwards. Lay the first tile at a 45-degree angle using your carpenter’s square, then continue adding more tiles. Use tile spacers to maintain even gaps between the tiles and the rubber mallet to gently tap tiles into place if required. Continue until you reach the first corner.
- Step 6: Once you reach the first room border, use the tile saw (or tile cutter) to cut some tiles that will be placed at the edges. Next, lay them so that the first corner is complete.
- Step 7 (continuous): It’s good practice to periodically use a spirit level to ensure that the tiles are flat and even. This way, you still have time to adjust as required.
- Step 8: Carry on tiling small sections, applying adhesive and laying tiles in the herringbone pattern, until the entire floor or wall is tiled.
- Step 9: Allow the adhesive to set according to the manufacturer's instructions.
- Step 10: Once the adhesive is fully set, apply grout to fill the gaps between tiles. Wipe away excess grout with a damp sponge. Depending on the type of tiles and grout used, you may need to apply a tile sealer before grouting, to protect the surface.
And there you have it – you now know how to lay herringbone tiling. Of course, if you’re still unsure about which tiles to use, please get in touch with our team of experts or check out our design blog for inspiration. Don’t forget to browse our tile advice section as well for more articles like this one.