
Whether you’re installing a brand-new set of tiles yourself, or you’re looking to replace old ones, getting to grips with grouting is an essential part of any DIY project, for a high-quality finish.
Grouting is one of the most vital steps when it comes to any tile installation, whether you use natural stone or porcelain-effect, and is important to do correctly the first time to avoid wasting time or money fixing any mistakes.
So, if you’re after some top tile grouting tips, continue reading the rest of our guide while we break down what grout is, why you need it, how to grout tiles properly, and the steps to avoid so your tiles continue looking great for years to come.
What is grout?
For those who may not be familiar with tiling terminology, you might not be entirely sure what grout is specifically. But, if you already have tiles in your home, it’s something you actually see daily – the spongy, hardened material that sits between every tile.
Essentially, grout is just another form of adhesive. However, unlike tile adhesive, which is specifically used for glueing each tile to your wall or floor, grout sticks between your tiles so that everything looks uniform and tidy.
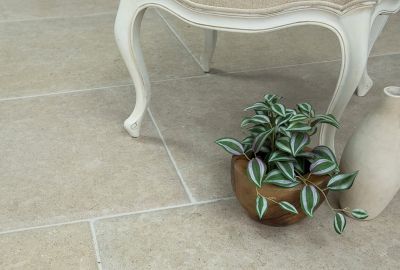
Montpellier Stone White Antique-effect Porcelain
Why is it important to grout your tiles?
Besides making your walls and floors look good, the main reason you want to grout your tiles is to prevent excess tile expansion and movement. Regardless of what area of your home you install your tiles in, they will experience temperature fluctuations. This in turn will cause your tiles to slightly expand and contract – hence why you need grouting.
Acting as a cushion for your tiles, grout will minimise how much your tiles shift, preventing them or the adhesive beneath from cracking. Not only that, but it will also ensure no dirt, debris or moisture can get behind your tiles and weaken their bonding.
How to grout wall tiles
Having covered what grout is and why it’s important, let’s look at exactly how to grout wall tiles for a clean finish – whether you’re installing a new set or replacing your old ones.
First things first, you’re going to need the right equipment. This means grabbing the following:
- Large bucket
- Grout float
- Sponge
- Microfiber cloth
- Squeegee
- Grout rake
- Stanley knife
Next, you’ll want to copy the following steps:
1. Clean your tiles
Start by using your Stanley knife and microfibre cloth to remove any dust, extra adhesive, and debris from between your tiles. You don’t want anything in the way that could affect your grout’s adhesive properties. This also applies if you’re grouting old tiles, though you’ll first need to remove the old grout using your grout rake.
2. Seal your tiles
With your tile gaps clean, wipe down your tiles again and wait for the entire area to fully dry. Once it is, seal your tiles (if required) so they’re prevented from absorbing any extra grout by accident.
3. Prepare your grout
Next, you’ll need to prepare your grout in the way stated on its packaging or its given instructions. For example, with powdered grout, you’ll need to add water and mix the combination together until it has a spreadable consistency, albeit one that holds its shape. Then, once mixed, it’s best to let your grout sit for 10 minutes before you start.
4. Apply your grout in stages
With your grout prepared, it’s time to take your grout float and apply a generous amount of grout to a small part of your wall, gently but firmly pressing your grout into the tile gaps in even strokes so that it fills the entire space – we recommend doing this at a 45-degree angle in a diagonal motion for the best effect.
Once this area is done, move on to the next until you’ve done a reasonable section of your wall. And don’t worry about getting your grout all over your tiles, this will be cleaned off well before it dries.
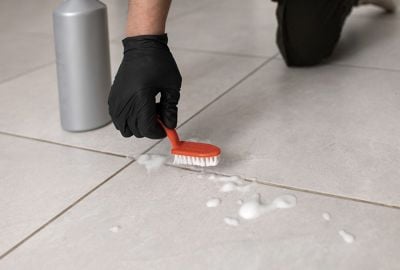
5. Clean and tool your grout lines
After you’ve grouted a sizable part of your wall, you’ll want to wipe your tiles down before the grout dries entirely. So, take your squeegee and wipe off whatever grout has spread out onto your tiles, dabbing any persistent areas with a damp (not wet) sponge where required.
Following this, you then want to tool your grout lines so they’re smooth and even. You can do this simply by taking your sponge, centring your index finger on one end, and then pressing down firmly as you run the sponge over the joints. This will push out excess grout and ensure what remains is level or slightly lower than your tile’s edges.
6. Finish the rest of your wall
With one area of your wall complete, move onto the next part and repeat the previous two steps until the entire wall is completely grouted. Then wipe off any excess grout still remaining with your squeegee and sponge and let your wall sit for 10 minutes or so before doing it again.
If any grout still persists, it’s best to scrub it clean with your microfiber cloth. You want to avoid any grout being left behind before final sealing, otherwise, it might haze – this is something best avoided as it’s particularly hard to remove grout haze once set.
7. Seal your grout
Last, but not least, it’s time to seal your grout with an appropriate grout sealer. Following the product’s instructions, apply the sealant to your wall and then wipe down any that gets on your tiles.
Then simply wait for your tiles to dry for the recommended length of time before polishing them to a shine.
How to grout floor tiles
Although floor tiles and wall tiles can be grouted in the same manner, there are a few factors to be aware of when grouting your floor. Specifically, floor tiles may need more or less grout, depending on the area in question and the size of your tiles, as well as the use of flooring-specific grout, which is designed to fill wider gaps.
Other than this the process of grouting your floor is exactly the same as your wall.
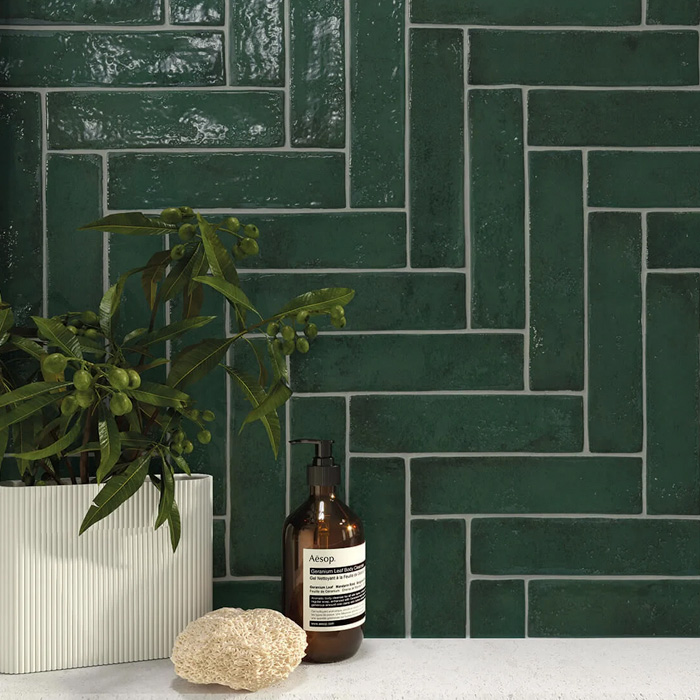
A contrasting grout colour is a brilliant way to highlight your metro tile layout (featured: Vintage Racing Green)
Additional tile grouting tips
So, now you know the steps of how to grout tiles in your home, continue reading to discover our top grouting techniques to make the DIY job easier.
First off, while all grout does the same job, it’s always smart to pick the right type of grout for the room. That’s because some grout is better suited to wet environments than others. So, if you’re tiling a bathroom or kitchen sink, we’d suggest using an epoxy grout or a latex-modified, sand cement mixture, as these are both water resistant.
Second, it’s best to try and calculate the size of the space you will be grouting before you start, as you don’t want to run out of grout halfway through the job. Never add additional water to your grout to make spreading it easier, as this will only weaken the grout.
Third, we strongly suggest using a silicon sealant to the inside corners (where they connect to the wall or worksurface) as it offers more flexibility and provides a better seal than just grout especially in a bathroom.
Finally, when buying your grout, be sure you choose a colour tone that matches the shade of your tiles. If in doubt, a light grey grout will tend to work with any colour tile that won’t clash.
And there you have it; that’s everything you need to know about grouting tiles yourself. Of course, this information needs the tiles to go with it, so why not take a look at the full Stone Superstore range today?
From indoor bathroom and kitchen tiles to outdoor paving slabs, we have tiles to suit all areas of your home. Get in touch today to find out more about how we source our products and don’t forget to visit our blog for more inspiration and advice!