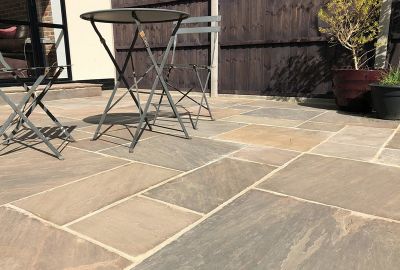
A brand-new set of stone pavers laid out in a garden path, or a stylish patio is a fantastic way to elevate your home style. But over time, even the best stone pavers will eventually fade and lose their original aesthetic due to the natural elements they are exposed to.
However, the good news is that, with the right know-how, effort, and equipment, you should have no problem cleaning your stone paving and bringing it back to showroom condition.
So, to help you understand the best way to start cleaning natural stone paving, here’s everything you need to know about preparing your slabs before you get started, and how to clean a stone patio without damaging it.
![]()
Midnight Black Limestone Paving Slabs
Important things to know when cleaning natural stone paving
When it comes to knowing how to clean outdoor stone tiles, you want to be sure that you don’t damage their natural aesthetic with aggressive cleaners or tools. With that in mind, here are our top four tips to bear in mind as you’re cleaning stone paving, to get the best results:
1. Always clean your natural stone with hot soapy water and a hose or low setting on a jet washer to remove persistent dirt to minimise tile erosion.
2. Remove any blackspot, mildew, and algae from your paving patio or driveway using a ready-to-use deep cleaning solution that is stone friendly.
3. Remove any rust and stains caused by fixtures and fittings using a non-acidic rust stain remover.
4. Remove excess grout and grout stains using a residue remover that won’t damage your slabs.
With these four tips alone, you should have enough information to get started cleaning your natural stone paving, but continue reading if you want to know how to clean a stone patio and slabs in detail.
Regular cleaning and maintenance
Unless your outdoor tiles are laid in a particularly open or moisture-prone area, your stone slabs should only require minimal cleaning over the seasons in the form of hot soapy water. This can be administered however you like, though, for the fastest and most noticeable impact, we suggest using a very low-power pressure washer. Avoid using any form of high-power pressure washer, as this can damage your tile’s sealant and make them prone to further staining.
But if you do want to spruce your tiles up with more than just warm water, such as after winter when leaves and debris have marked their surface, then using a suitable solution like diluted LTP Grimex can be a quick way to remove these stained imperfections.
Removing black spots, mildew, and algae from stone paving
One of the challenges of maintaining the appearance of paving is battling against naturally growing fungi and algae, such as mildew and blackspot, which can take hold on your stone pavers over time. So, to make protecting and cleaning your natural stone patio against this problem easier, we recommend using an LTP Mouldex Paving Cleaner.
Specifically manufactured products like these can effectively remove black spots, lichen, moss, and stains from all types of patio paving, including natural stone. Just follow the directions for the product and you shouldn’t have any trouble removing them.
And once dried, you might also want to consider applying an LTP External Stone Sealer to help prevent moisture and organic particles from absorbing and taking hold on the surface again, minimising the chances of you having the same problem next year.
Removing rust and stains caused by fixtures and fittings
While most stone tiles will never be directly attached to or continually touching anything metal, in the rare cases that they are, you will likely find that any rust present may eventually stain your slabs over time.
Fortunately, this is an easy problem to solve when cleaning outdoor stone pavers, only requiring you to get your hands on a product like LTP Rust Stain Remover to clear away the markings. This non-acidic formulation acts quickly when applied directly on the surface being treated, removing stains in just 15 minutes!
Removing excess grout and grout stain
One of the most common problems many households face when laying any outdoor paving, but especially for those with external stone patios, is the potential for your tiles to be stained by grout during the installation process.
Unfortunately, removing excess grout that lingers in every nook and cranny can be a challenge, and it’s often only noticeable once you’ve completed the installation and the grout has dried. However, it’s not impossible.
To begin cleaning outdoor stone pavers covered in grout, we recommend using an LTP Cement, Grout, and Salt Residue Remover. This product acts as a rapid-action cleaning agent for removing these impurities, and you should be able to remove any grout stain over a few days by following the instructions provided with the product.

How to protect your natural stone tiles against dirt
Although all natural stone tiles, no matter how well they are protected, will eventually need cleaning, as the old saying goes – prevention is better than the cure. So, to make sure your stone tiles only ever require minimal cleaning to eliminate dirt and stains, here are a few things you can do during the installation process to protect them.
Keep your slabs clean before and during the installation process
Due to the way it’s formed, all natural stone is slightly porous and therefore vulnerable to staining if not treated with a sealer. For this reason, it’s essential to keep your slabs as clean as possible during the installation process and before sealing so that no impurities are absorbed.
Should fixing material, adhesive, or mortar mix spill onto your slabs, wipe it away with clean water before it sets hard and stains the stone. And when storing your slabs before they’re laid, be sure to cover them with a waterproof tarpaulin to block dirt.
It’s also worth noting that if your tile delivery includes adhesive and grout, it should be removed from the pallet and stored in a dry place to prevent moisture from getting into the packaging and turning the contents into a solid block, rendering the goods unfit for use.
Clean your slabs before grouting
With external paving installations, it’s not uncommon for dust (from cutting slabs) and general grime and dirt to collect on the surface of your newly laid patio or driveway before it is finished.
And while letting this dirt build up is no problem, it must be thoroughly cleaned off before your slabs are sealed, otherwise, they will be locked into the stone by the sealer and become permanent stains.
To clean slabs properly before grouting, we recommend using LTP Grimex to remove these residues and impurities. This product is suitable for all stone natural types, including travertine, limestone, sandstone, slate, marble, granite, terracotta, quarry tiles, and brick, whether fitted externally or undercover.
Alternatively, if you’re looking for the best way to clean indoor tiles before grouting, we’ve also got you covered!
Always seal your natural stone paving
Finally, once you’ve laid your stone pavers, it’s absolutely essential that you seal them fully during installation and every 2-3 years thereafter, to protect your tiles from further dirt buildup. To do this, we recommend using LTP External Stone Sealer, an impregnating sealer suitable for all types of stone which is moisture-repellent and stain-resistant.
The sealing process itself is relatively simple and you can read all about it in our article on sealing your tiles before grouting, or watch the step by step video below on how to use external stone sealer:
You should have no problem cleaning your stone pavers this summer. Of course, it’s not just outdoor tiling that needs cleaning, and you can read all about cleaning indoor stone tiles and maintaining porcelain pavers – as well as much more – within our range of tile advice guides.


